
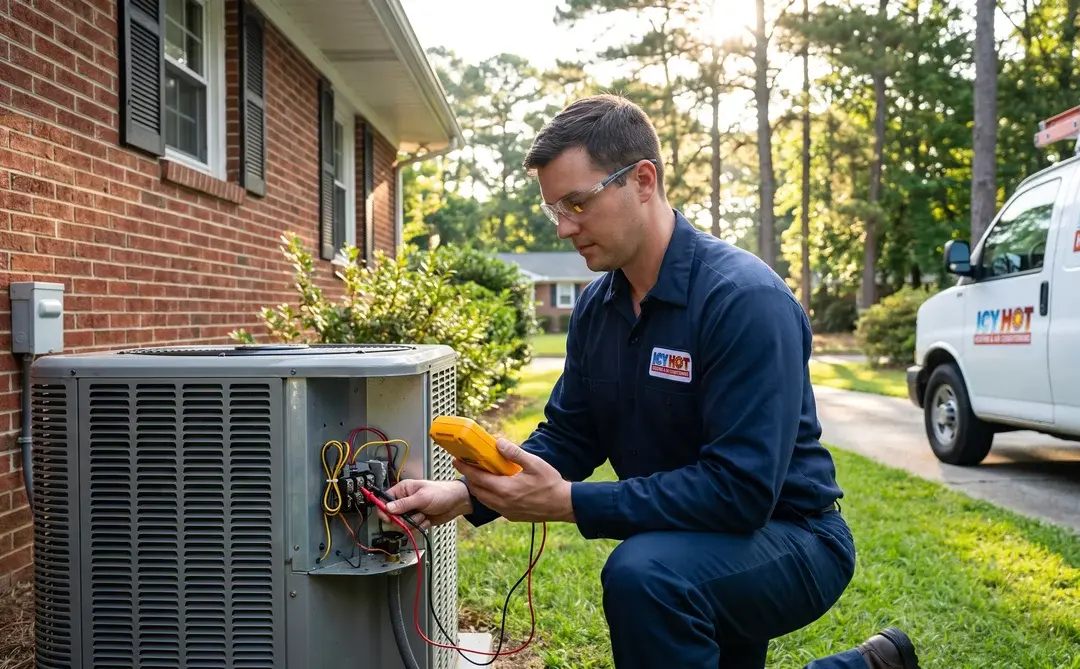
There is a specific kind of quiet that tells a Raleigh homeowner something is wrong. Not the sound of an air conditioner struggling, not warm air drifting from the vents, just nothing at all. You push the thermostat down, you wait, and the house stays silent while the outdoor temperature keeps climbing.
Here is the useful thing to know before you call anyone: a system that will not turn on fails for a much shorter list of reasons than a system that runs badly. Most of that list is electrical, most of it is cheap, and a meaningful share of it is something you can check yourself in the next ten minutes without opening a single panel. I have driven to plenty of Triangle addresses on a 96 degree afternoon and fixed a “dead” air conditioner by pushing a float switch back down or flipping a service switch somebody bumped while moving boxes in the garage.
This guide walks the eight checks in the order a technician actually works them, tells you where to stop, and prices the realistic outcomes in Raleigh so you know what you are looking at before the truck shows up.
TL;DR: Work these in order. Set the thermostat to Cool with the setpoint at least 3 to 5 degrees below room temperature, and check its batteries. Check the breaker for the indoor and the outdoor unit, and if it trips again immediately, stop resetting it. Confirm the indoor service switch and the outdoor disconnect are both on. Pull the air filter. Then look at the condensate drain pan, because a tripped float switch shuts a perfectly healthy system down with no other symptom, and in a Raleigh August it is one of the most common no-start calls we run. Check for ice, listen for a hum or a click at the outdoor unit, and give the system five minutes before you decide it is dead. In Raleigh, a diagnostic visit runs $75 to $200, and the two most likely repairs, a fuse, breaker, or relay at $30 to $300 and a capacitor or contactor at $90 to $475, are nowhere near compressor money.
Why Won’t My AC Turn On?
An air conditioner that will not turn on has almost always lost power, lost its command to start, or been shut down on purpose by one of its own safety devices. That is the whole map. Everything below is a way of finding out which of those three it is.
It helps to know that your system is not one machine but two, wired together and told what to do by a third. The indoor air handler or furnace holds the blower and the evaporator coil. The outdoor condenser holds the compressor and the condenser fan. The thermostat sends a low-voltage signal that tells both of them to start. Each of the two units has its own circuit breaker and its own shutoff switch, and the system carries several safety switches that will cut the whole thing off rather than let it damage itself or flood your ceiling.
Carrier lists eight common causes for this exact symptom: a tripped circuit breaker, a blown fuse, thermostat issues, a clogged air filter, a faulty capacitor or contactor, a refrigerant leak, wiring problems, and a malfunctioning motor. Note how the list is ordered. The first five are inexpensive and three of them are things you can look at yourself. Carrier also sets the boundary clearly: “You should call a Carrier expert if you have checked the filter, thermostat, and breaker, but the AC unit still will not turn on.”
That is the honest shape of this problem. There is a short DIY zone at the front, and then there is a line, and past that line you are dealing with 240 volts and a capacitor that holds a charge after the power is off. This guide takes you to the line and stops. If the capacitor turns out to be the culprit, we break down what an AC capacitor replacement costs in Raleigh separately.
First, Split the Problem in Two
Before you touch anything, spend thirty seconds gathering one observation. It is the single most useful thing you can do, and it is the step every generic troubleshooting list skips.
Set the thermostat to Cool, drop the setpoint at least 5 degrees below the current room temperature, and then go stand where you can hear both units. Wait a full minute. What happens next puts you on one of two completely different paths.
Path A: nothing happens anywhere. No air from the vents, no click from the thermostat, no hum from the closet or the attic, no fan spinning outside. When both halves of the system are silent, the problem is upstream of both of them: the thermostat itself, the low-voltage control circuit, or a safety switch that has interrupted that circuit. A single failed part in the outdoor unit cannot silence your indoor blower, because they run on separate circuits and separate motors.
Path B: the indoor blower runs but the outdoor unit sits there. You feel air at the registers, probably room temperature air, and outside the condenser fan is not turning. Now the thermostat is clearly working and clearly calling for cooling, because it got the blower going. The failure is in the outdoor unit or in what feeds it: its own breaker, its own disconnect, its capacitor, its contactor, or the fan motor. Lennox covers this scenario specifically and calls out the tell that narrows it fastest: “If you notice a buzzing or humming noise coming from the outside AC unit, the capacitor may have failed.”
Knowing which path you are on cuts the list of suspects roughly in half before you have touched a tool. Work the checks below in order either way, but expect Path A to resolve in checks 1, 2, 5, or 8, and Path B to resolve in checks 2, 3, 7, or 8.
Check 1: The Thermostat
Start here every time, and do not feel silly about it. A thermostat is the one part of your HVAC system that a person interacts with daily, which makes it the part most likely to have been changed, drained, or bumped.
Three things to confirm, in this order. First, is the screen on at all? Trane‘s guidance on a blank display is direct: the thermostat “may need new batteries. Replace as necessary.” Bryant says the same thing as a first step, asking homeowners to ensure “your thermostat has fresh batteries and is communicating correctly with the HVAC system.” A dead battery in a battery-powered thermostat produces exactly the symptom you are troubleshooting: a completely silent house.
Second, is it actually set to cool? Trane wants the mode on COOL and the fan on AUTO. Carrier phrases it as ensuring the thermostat “is set to ‘Cool’ rather than ‘Heat.’ If unsure, set it to ‘Auto.'” In a Raleigh spring this trips up more people than you would expect, because we get 80 degree afternoons in April while systems are still sitting in heat mode from the last cold snap.
Third, is the setpoint low enough to actually create a call for cooling? Carrier says the temperature must be “set lower than the current room temperature.” Lennox puts a number on it, recommending the thermostat be “switched to ‘cool’ and set at least 3-5 degrees below room temperature.” If your house is 78 and the thermostat says 77, a system with any deadband at all may simply not see a reason to start.
One more thing to look for on the display, because it is the answer more often than people realize: a blinking indicator. If your thermostat is flashing “Cool On” or showing “Wait,” it is not broken and your AC is not dead. Skip ahead to check 8.
| What you see | What it usually means | Your move |
|---|---|---|
| Blank screen | Dead batteries, or the thermostat has lost its 24-volt power from the air handler | Replace the batteries. If the screen stays blank, go to check 3 |
| Screen on, nothing responds | Wrong mode, setpoint too high, or a broken low-voltage control wire | Set COOL and drop 5 degrees below room temp, then wait one minute |
| Blinking “Cool On” or “Wait” | A deliberate startup delay protecting the compressor | Nothing. Leave it alone and see check 8 |
| Loose on the wall or hanging | Poor contact with the base plate, so the call for cooling never completes | Reseat it firmly on its base and try again |
Check 2: The Circuit Breaker, and Only Once
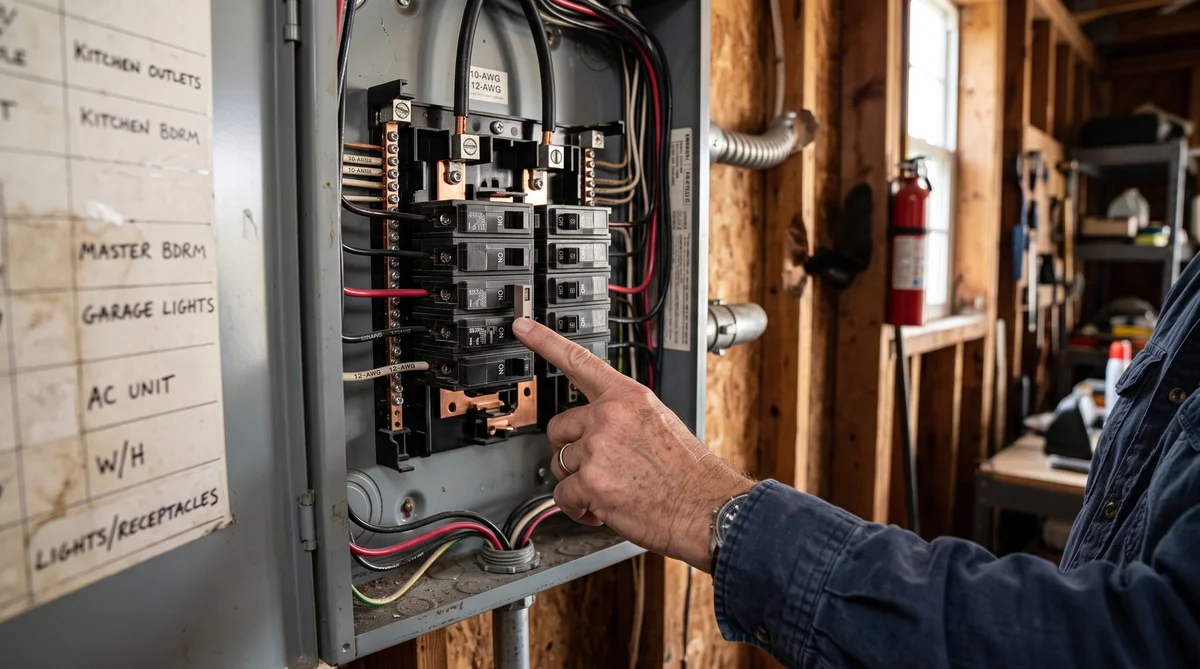
Go to your electrical panel and look for the HVAC breakers. Note the plural. Your system almost certainly has two: a smaller one for the indoor air handler or furnace and a larger double-pole breaker for the outdoor condenser. Trane’s instruction covers both: “Check your circuit breaker box to ensure that the breaker is not tripped for the indoor OR outdoor unit.” Carrier’s is simpler: “Visit your electrical panel and verify that the breaker for the HVAC system is in the ‘ON’ position.”
A tripped breaker is not always in an obvious position. Many will sit in a middle detent that looks almost like ON if you are glancing at it. Compare the HVAC breakers to the ones around them and look for the one that is out of line with its neighbors.
Now the part that matters more than the reset itself. Carrier puts two boundaries on this step: “Only reset a breaker if you are comfortable doing so. If the breaker trips immediately after resetting, do not try again,” because that “indicates a deeper electrical fault that requires a professional who knows how to troubleshoot an air conditioner safely.” Trane goes further and advises homeowners not to reset it at all, saying to contact a professional because a trip may point to a serious problem.
My field version of that rule: you get one reset. If the breaker holds and the system runs, you had a nuisance trip, which happens after a summer storm or a brownout, and you should still mention it at your next service visit. If it trips again within seconds or minutes, leave it off and pick up the phone. A breaker that keeps tripping is doing its job, and the two things it most often protects you from are a shorted compressor winding and a burned wire, both of which get more expensive every time you feed them power.
One local note. Raleigh gets pop-up thunderstorms most summer afternoons, and a surge or a brief outage will trip HVAC breakers across a whole neighborhood. If your power blinked earlier today, that is a strong reason to expect a simple trip here, and also a reason to read check 8 before you conclude anything.
Check 3: The Two Shutoff Switches You Forgot You Have
This is the check that saves the most service calls, because both of these switches exist, both are easy to turn off by accident, and most homeowners have never been told they are there.
The first is the indoor service switch. Carrier describes it plainly: “Ensure this switch is toggled to the ‘ON’ position.” Trane describes what you are looking for: a switch that “resembles a light switch near the furnace.” It is usually mounted on or beside the air handler, in a closet, a garage, a crawlspace, or an attic, and it looks exactly like an ordinary wall switch, often with no cover plate label at all. Painters flip it. People moving boxes in the garage flip it. Anyone who has ever gone looking for a light in that closet has flipped it.
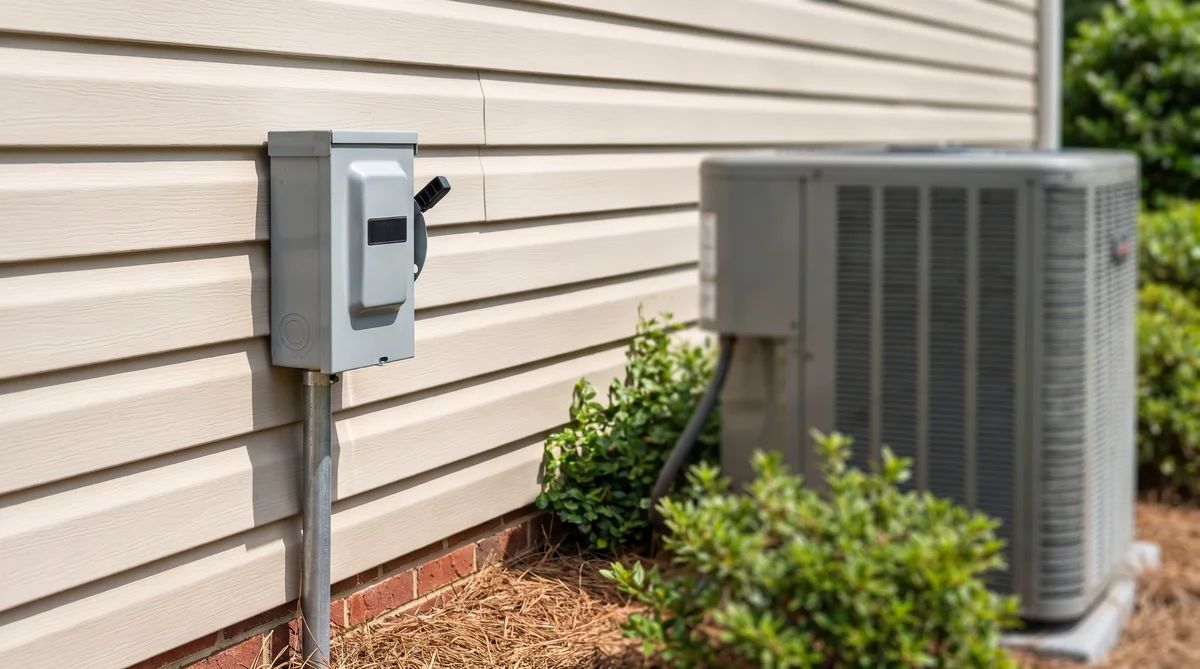
The second is the outdoor disconnect. It is a grey weatherproof box on the exterior wall within a few feet of your condenser, and it either has a lever, a toggle, or a pull-out block. Carrier’s instruction: “Verify that this switch has not been turned off or pulled out.” Bryant folds it into its very first troubleshooting step: “Verify that your AC is receiving power by checking the outdoor disconnect switch and your home’s main electrical panel for a tripped breaker.”
Two safety notes on the outdoor disconnect. You can look at it and you can confirm a pull-out block is seated, but do not open the box, do not remove a fuse to inspect it, and do not start probing. Fuses inside a disconnect can blow without any visible change, and confirming that takes a meter. Second, if you find that either switch was off and you turn it back on, do not be alarmed when nothing happens right away. That is check 8.
Check 4: The Air Filter
A filter cannot stop a system from receiving power, so it may seem out of place on a no-start list. It earns its place because of what happens downstream. A badly clogged filter starves the evaporator coil of airflow, the coil gets too cold, it frosts over, and the system either shuts itself off on a safety or fails on the ice. By the time you notice, the symptom looks like a dead air conditioner rather than an airflow problem.
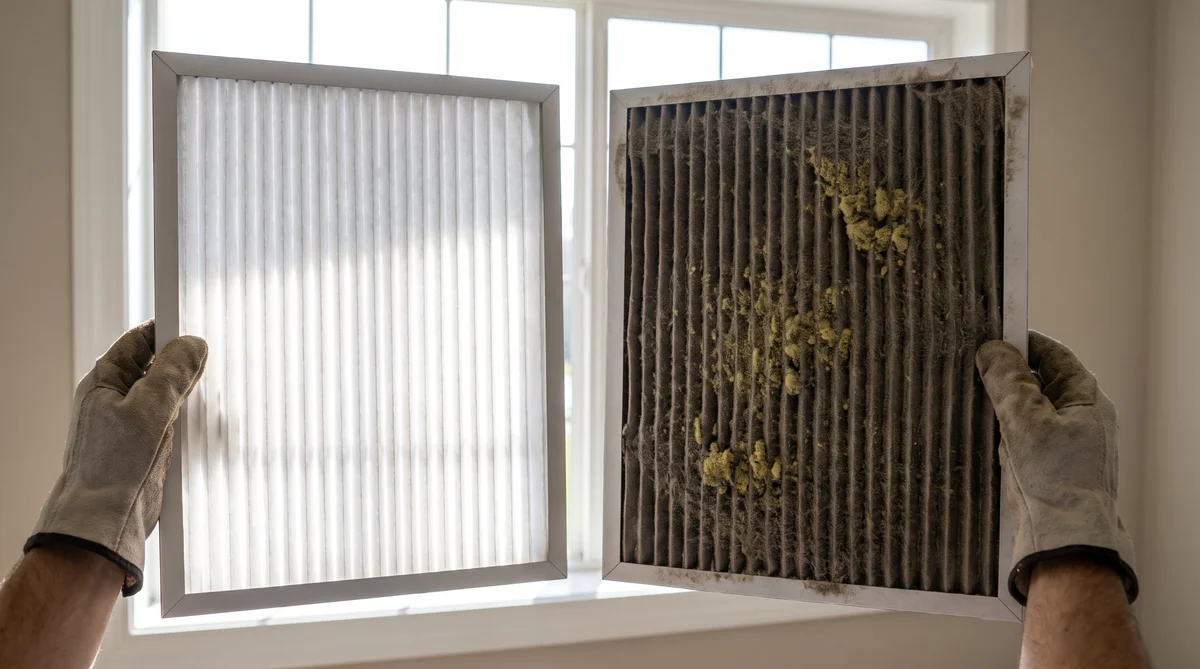
Carrier ranks a clogged filter fourth among its eight causes for a unit that will not turn on and gives you a one-glance test: “A dirty filter compromises efficiency and airflow. Check your filter and replace it if it is gray or clogged.” Trane connects the dots to the freeze, noting that poor airflow can lead to frozen coils. Bryant is the most direct about how common it is, calling a clogged filter “one of the most common reasons an AC is not cooling” and noting that it “restricts airflow, strains the system, and can cause coils to freeze.”
ENERGY STAR sets the interval that prevents all of this: “Inspect, clean, or change air filters once a month in your central air conditioner, furnace, and/or heat pump,” and warns that a dirty filter can raise energy costs and damage equipment, leading to premature failure. In the Triangle I would treat monthly inspection as the floor rather than the ceiling, because our spring pine pollen loads a filter faster than almost anything else in the country, and a filter that looked fine in March can be a grey mat by May.
Pull the filter out and hold it up to a light. If you cannot see light through it, replace it, then go on to check 5 and check 6 rather than assuming you are done, since a filter that bad has usually already caused a freeze.
Check 5: The Condensate Drain Pan and Float Switch
This is the check the ranking articles bury and the one I would move to the top of the list for Raleigh in August. It is the failure mode where a completely healthy air conditioner refuses to start, gives you no noise, no smell, no error, and no other clue at all.
Your evaporator coil pulls water out of your indoor air. On a humid Triangle day that is gallons, not cups, and all of it has to run out through a condensate drain line. When that line clogs with the biofilm slime that grows in it, water backs up into the drain pan. Our full walkthrough on clearing a clogged AC drain line covers the ten-second check that tells you whether yours is blocked. Rather than let the water overflow into your ceiling, a safety device called a float switch rises with the water and opens the low-voltage control circuit. The system shuts down and will not restart.
Trane names the mechanism precisely: “A clog in the drain line can cause water damage, or a system shutdown if the unit is equipped with a condensate safety switch.” Lennox lists a tripped float switch among its causes for an outdoor unit that will not run, describing it as the safety activating when water builds up in the drain pan. ENERGY STAR puts the prevention on its annual checklist, telling homeowners to “check and inspect the condensate drain in your central air conditioner, furnace and/or heat pump (when in cooling mode),” and warning that “a plugged drain can cause water damage in the house and affect indoor humidity levels.”
What you can safely do: find your indoor unit and look at the drain pan under the coil. If you see standing water in the pan, or water on the floor or the platform under the air handler, you have found your answer. You can also look for a small plastic switch clipped onto the side of the pan or spliced into the drain line, usually with two thin wires running out of it. Do not try to clear the line with a shop vac and then call it fixed, and do not simply hold the float down to force a start, because the water is still there and the ceiling below is still at risk. What you have learned is worth a lot: this is a drain problem, not an equipment failure, and it is one of the least expensive visits we run.
| What to look for | Why it points to the float switch |
|---|---|
| Standing water in the drain pan | The pan should be damp, never holding water. Standing water means the line is not draining |
| Water stains or damp insulation under the air handler | The pan has already overflowed at least once, which is exactly what the switch exists to stop |
| Nothing at all runs, including the blower | A float switch opens the low-voltage control circuit, which silences the whole system, not just the condenser |
| It quit on a humid day after running fine | Condensate volume tracks humidity, so a marginal drain line fails first on the muggiest afternoons |
| The outdoor drain stub has not dripped in days | A working line drips steadily in cooling season. A dry stub during a heat wave means a blockage |
Check 6: Ice on the Coil or the Line Set
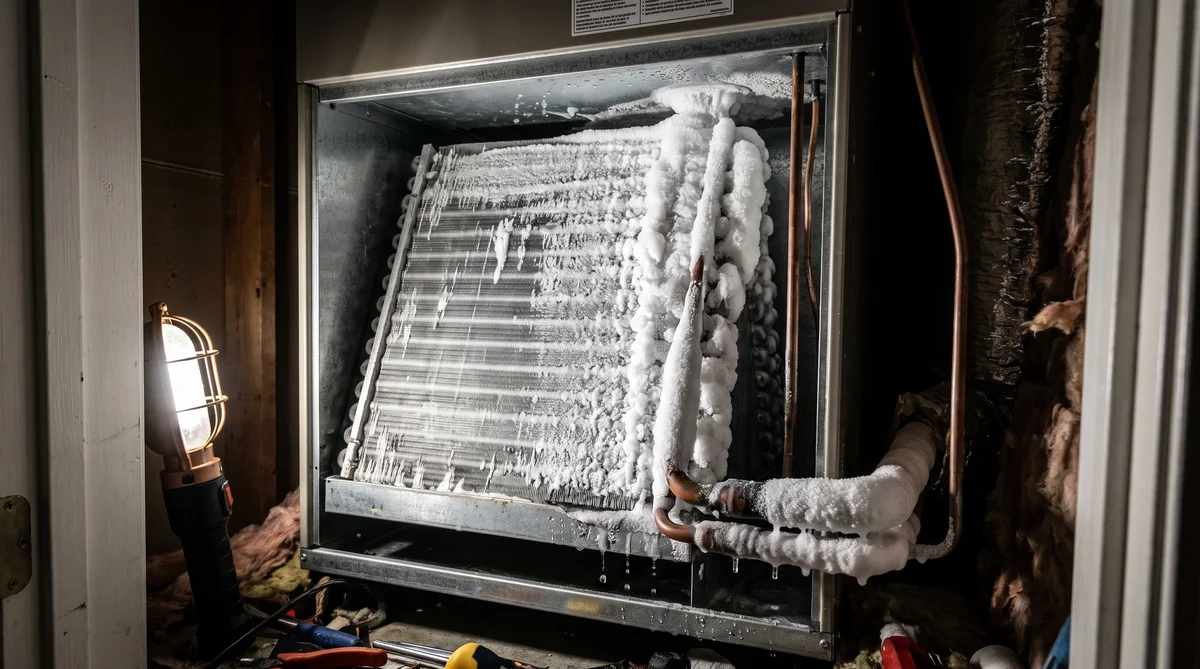
Look at the copper refrigerant lines where they leave your indoor unit, and if you can see the evaporator coil, look at that too. You are looking for frost or a solid sheath of ice. If you find it, you have found your problem, and there is exactly one correct next move.
Carrier’s instruction is one sentence and it is not negotiable: “If you see ice, shut the system off immediately to prevent compressor damage. Contact a Carrier dealer, as this usually signals a refrigerant or airflow problem that requires expert repair.” Lennox gives the same guidance for the no-start case, saying that if the AC is not turning on or is failing to cool, turn the system off and allow the coils to thaw completely.
The reason to be strict about it is mechanical. A compressor is built to pump gas. When a coil is iced over, refrigerant does not fully boil off inside it, and liquid heads back down the suction line toward a pump that cannot compress liquid. That is how an airflow problem worth a filter turns into a repair worth four figures. Our guide to why an AC freezes up walks through the full thaw-and-diagnose sequence.
Ice also tells you something about which of two underlying problems you have. If the filter you pulled in check 4 was filthy, airflow is the likely cause and the fix may be cheap. If the filter was clean and the coil is still frozen, the cause is more often low refrigerant charge from a leak. Lennox describes how that ends in a no-start: with a leak in the coils “the system will have trouble keeping up, the indoor coil may freeze, and eventually the low-pressure switch will prevent the system from operating to protect the compressor from damage.” That is a safety device doing precisely what it should. Either way, refrigerant work is not homeowner territory. The EPA requires that technicians who maintain, service, repair, or dispose of equipment that could release refrigerants be certified.
Check 7: The Hum, the Click, and the Silent Fan
This check belongs to Path B. The blower is running, the thermostat is calling, and the outdoor unit is not doing its job. Go stand next to the condenser and listen carefully for thirty seconds, because the sound it makes narrows the diagnosis more than anything else you can observe from outside the cabinet.
A low, steady hum or buzz with no fan movement is the classic signature of a failed run capacitor. Lennox says it directly: “A bad capacitor won’t be able to power the fan. If you notice a buzzing or humming noise coming from the outside AC unit, the capacitor may have failed.” Trane frames the same part as a distinct cause of the whole symptom: “If the dual capacitor or start capacitor has gone bad, your AC unit won’t turn on.” Carrier groups the capacitor with the contactor and explains why either one produces a dead unit: “If these components are faulty or damaged, the air conditioner won’t turn on because it cannot receive the necessary power signal.”
A repeated clicking or chattering with no start usually means the contactor. That is the relay that closes to send high voltage to the compressor and fan, and its silver contacts pit and burn over the years. Raleigh’s pollen, humidity, and the occasional ant colony inside the control compartment are all hard on contactors.
Total silence outside while the blower runs indoors points at the outdoor breaker, the disconnect, or a blown fuse in the disconnect box. Go back and confirm checks 2 and 3 before assuming anything expensive.
A grinding, screeching, or rattling noise is different in kind. Bryant’s rule applies: sounds like “buzzing, grinding, or hissing are warning signs of a serious mechanical issue,” and the instruction that follows is to “turn the system off immediately to prevent further damage.” Shut it down and call.
Here is the boundary, stated plainly. You can listen. You cannot test. A run capacitor stores enough charge to injure you badly after the power has been off, and everything inside that cabinet carries 240 volts. Do not open the condenser’s electrical access panel. If the sound tells you the capacitor is the likely culprit, that is genuinely useful information to give us on the phone, and it is where your part of the job ends. Our guide on telling whether an AC compressor is bad covers why a hum-with-no-start is so often a cheap part rather than the expensive one.
| What you hear | Most likely part | Typical Raleigh cost |
|---|---|---|
| Steady hum or buzz, fan not turning | Run or start capacitor | $90 to $475 |
| Repeated clicking or chattering | Contactor | $90 to $475 |
| Complete silence, blower still running indoors | Blown fuse, tripped breaker, or open disconnect | $30 to $300 |
| Fan spins but you hear nothing else | Compressor not starting | Diagnostic first, $75 to $200 |
| Grinding, screeching, or rattling | Internal mechanical damage | Shut it off now and call |
Check 8: The Reset Button and the Five-Minute Delay
Two things live here, and between them they explain a real share of the “my AC is dead” calls we take after a storm.
The first is a reset button. Carrier includes “locate and press reset button” in its seven troubleshooting steps. Many condensers have a small, often red, button on the cabinet or inside an access door, and some systems have one at the air handler instead. If yours has one and you can reach it without opening an electrical panel, press it once.
The second is the more important one, and it is the reason patience belongs on a troubleshooting list. Modern systems deliberately refuse to start immediately. Trane explains the mechanism: “A power outage can cause a power surge, which can harm your compressor. As a safety measure, the thermostat institutes a startup delay, allowing the compressor to reset and start up again safely.” The same protection fires after a normal shutdown: “If the compressor just shut off, the thermostat may delay an immediate re-starting to avoid overheating or short cycling. After an appropriate amount of time, the thermostat will signal the compressor to start up again.” A thermostat flashing “Cool On,” or showing “Wait” on some brands, is telling you exactly this.
Trane does not publish a fixed number, and delay lengths vary by equipment and thermostat. In practice, five minutes covers most residential systems. So after a Raleigh afternoon thunderstorm knocks the power out, or after you have just reset a breaker or turned a service switch back on, set the thermostat where you want it and then leave it alone for five full minutes before you conclude anything. The mistake I see is the opposite: a homeowner cycles the breaker four times in ninety seconds trying to force a start, which resets the delay each time and can trip protective controls on the way.
| Step | What to do | Why it matters |
|---|---|---|
| 1 | Confirm household power is back and steady | A brownout can trip the breaker again the moment the compressor tries to draw start current |
| 2 | Set the thermostat to Off | Keeps the system from calling for cooling while you are at the electrical panel |
| 3 | Reset the indoor and outdoor HVAC breakers, once | One reset only. A second trip is an electrical fault, not a nuisance |
| 4 | Set the thermostat to Cool, 5 degrees below room temperature | A genuine call for cooling is what starts the sequence, and it starts the delay timer |
| 5 | Wait five full minutes without touching anything | The thermostat is holding a deliberate startup delay to protect the compressor after a surge |
| 6 | Still silent after five minutes? Return to checks 3, 5, and 7 | The outage more often exposed an existing weak part than created a new fault |
What Each Fix Costs in Raleigh
The reason to work these checks in order is not only that it is faster. It is that the causes at the top of the list are dramatically cheaper than the ones at the bottom, and knowing the spread keeps you from agreeing to the wrong repair.
HVAC.com’s Raleigh air conditioner repair cost guide prices the realistic outcomes of a no-start call. A troubleshooting inspection runs $75 to $200. Replacing fuses, circuit breakers, or relays runs $30 to $300. A capacitor or contactor replacement runs $90 to $475. A thermostat replacement runs $125 to $475. A circuit board replacement, which is the least common of this group, runs $150 to $600.
Now the number that puts those in perspective. That same guide prices an AC compressor replacement in Raleigh at $1,000 to $2,900. Every single fix in the paragraph above tops out below $600. This is exactly why the eight checks matter: the failure that made your system silent is far more likely to be a $200 electrical part than a four-figure compressor, and a technician who reaches for the expensive answer first is skipping steps.
The parts themselves are often startlingly cheap. HomeAdvisor prices an AC capacitor at $8 to $45 for the part alone. What you are paying for on a capacitor call is the truck, the diagnosis, the correct part on the first trip, and the fact that somebody who is trained to do it safely is the one discharging a component that can hurt you. That is also why we ask for a photo of the data plate on your outdoor unit before we dispatch. For the full line-item picture, our Raleigh AC repair cost guide breaks down every common repair, and if the diagnosis turns out to be the compressor, our AC lifespan and repair-versus-replace guide covers whether the money belongs in the old system at all.
When These No-Start Calls Spike in the Triangle
Nobody discovers that their air conditioner will not turn on in February. They discover it on the first afternoon they actually need it, which is exactly why this failure feels like it comes out of nowhere.
We pulled twelve months of United States search demand for the phrase “ac not turning on” from Google Ads keyword planner data on August 17, 2026, and the shape of it matches our dispatch board almost exactly. Demand bottoms out at 1,300 searches in January and peaks at 12,100 in both June and July. That is a 9.3 times swing across the year. The steepest climb is not in summer at all, it is between February and March, when the number jumps from 2,400 to 6,600 in a single month.
That February-to-March cliff is the whole story. Your system sat unused through the winter. Contactor contacts oxidized, a capacitor drifted out of tolerance, a drain line grew a slug of biofilm, and none of it announced itself while the equipment was idle. Then Raleigh hands you an 82 degree day in late March, you call for cooling for the first time in five months, and the fault that had been sitting there quietly becomes an emergency.
The practical takeaway is a boring one that happens to be true: the cheapest version of this problem is the one you find in March on purpose instead of in July by surprise. A spring AC maintenance visit tests the capacitor against its rated microfarad value, inspects the contactor, flushes and treats the condensate line, tightens electrical connections, and confirms the system actually starts under load. ENERGY STAR’s own checklist puts “tighten all electrical connections and measure voltage and current on motors” on the annual list, warning that “faulty electrical connections can cause unsafe operation of your system and reduce the life of major components.” A maintenance plan puts that visit on the calendar so it does not depend on anyone remembering.
When to Stop and Call a Licensed Pro
Every manufacturer in this guide draws the same line, and it is worth stating in one place. Carrier: call an expert “if you have checked the filter, thermostat, and breaker, but the AC unit still will not turn on.” Bryant: call “if your air conditioner still fails to operate or cool properly after checking the power supply, air filter, and thermostat.” Trane adds a reason homeowners underweight, noting that DIY repairs could void warranty coverage if your system is still under warranty.
Stop immediately, regardless of where you are in the list, if the breaker trips a second time, if you see ice anywhere on the coil or the copper lines, if you hear grinding or screeching, if you smell anything burning, or if you find standing water at the air handler. Those five are not troubleshooting steps, they are stop signs.
And if the house is climbing past 85 degrees with a Triangle heat index on top of it, that is not a “wait until Tuesday” situation, particularly with infants, older adults, or anyone with a respiratory condition in the house. That is what our emergency AC service exists for, and we answer around the clock. Otherwise a standard AC repair visit gets you a real diagnosis with meter readings behind it rather than a guess. If the outdoor unit is the suspect, we handle compressor repair and condenser repair in house, and if the thermostat turns out to be the failure, we can talk through thermostat replacement options while we are there. When the diagnosis points at a system that is simply finished, our AC replacement team handles the sizing and the swap rather than dropping in whatever is on the truck.
| You can safely do this | Leave this to a licensed tech |
|---|---|
| Change thermostat batteries, set mode and setpoint | Any work inside the condenser’s electrical access panel |
| Reset a tripped breaker one time | A breaker that trips again, which means a real electrical fault |
| Confirm the indoor service switch and outdoor disconnect are on | Opening the disconnect box or testing or replacing its fuses |
| Replace the air filter | Testing or replacing a capacitor, which holds a charge after power off |
| Look for standing water in the drain pan and clear debris around the condenser | Clearing a clogged condensate line and resetting a float switch properly |
| Shut the system off if you see ice, or hear or smell something wrong | Anything touching refrigerant, which requires EPA Section 608 certification |
Frequently Asked Questions
Quick answer for Raleigh homes: Silence is usually power or a safety switch, not a dead compressor. Confirm the thermostat has batteries, is set to Cool, and is at least 3 to 5 degrees below room temperature. Reset the HVAC breaker once, never twice. Check the indoor service switch and the outdoor disconnect. Pull the filter, look for standing water in the drain pan, and look for ice on the copper lines. Then wait five full minutes. If it still will not start, the most likely repairs here run $30 to $475, not four figures.
The Bottom Line for Raleigh Homeowners
An air conditioner that will not turn on is one of the few HVAC problems where a homeowner working in the right order can genuinely solve it, or at minimum walk into the service call knowing what is going on. Here is what to hold onto:
- Split the problem first. Nothing running anywhere points upstream to the thermostat, the control circuit, or a safety switch. An indoor blower running with a silent outdoor unit points to the condenser’s own power, capacitor, or contactor.
- Check the thermostat before anything else: batteries, Cool mode, and a setpoint 3 to 5 degrees below room temperature.
- You get one breaker reset. If it trips again, that is an electrical fault, not a nuisance.
- Find the indoor service switch and the outdoor disconnect. Both are easy to bump off, and both produce a completely dead system.
- A tripped float switch from a clogged condensate line silences the whole system with no other symptom. In a Raleigh August, check the drain pan early.
- Ice anywhere means shut it off now. Running a system on a frozen coil is how a cheap problem becomes a compressor.
- A hum means capacitor, a click means contactor, and silence means power. Listen, then stop. Do not open the cabinet.
- Give it five minutes. Startup delays after an outage are a designed protection, not a fault.
- The realistic Raleigh price range for a no-start fix is $30 to $600, against $1,000 to $2,900 for a compressor. Insist on a diagnosis before approving the big number.
If your system is silent, humming, or tripping its breaker, we will bring the meter readings and tell you honestly when the answer is a cheap part. Call Icy Hot at (919) 673-7667 or request a free instant quote, and if the house is already too hot to wait, our Raleigh AC repair team is on call around the clock. If it turns out your system runs but never gets cold, our guide to an AC running but not cooling is the one you want next.